
I live in a rural area that has a very high deer population. Anything in a garden area that is not fenced in is quickly be eaten by the neighborhood deer. I created a new garden area last year and decided to try an inexpensive deer fence sold by Lee Valley (one of my favorite stores) http://www.leevalley.com/en/garden/page.aspx?p=57162&cat=2,43319,51785. I was initially very skeptical that the fence would work, since it was very thin and almost invisible, but I’ve had the fence up for a year with excellent results and not one deer has tried to get through it. The general construction I used was 10 foot treated 2X4’s for the corners and 10 foot 2X2’s (I just ripped a 2X4’s in half) for the middle posts. I dug 3 foot holes with a hole auger, which left 7 feet above ground for the deer fence. It is important to make sure you level your poles. I used regular staples from a staple gun to secure the fence mesh to the posts. Lee Valley sells galvanized staples, but I found these difficult to attach to the 2X2 uprights.
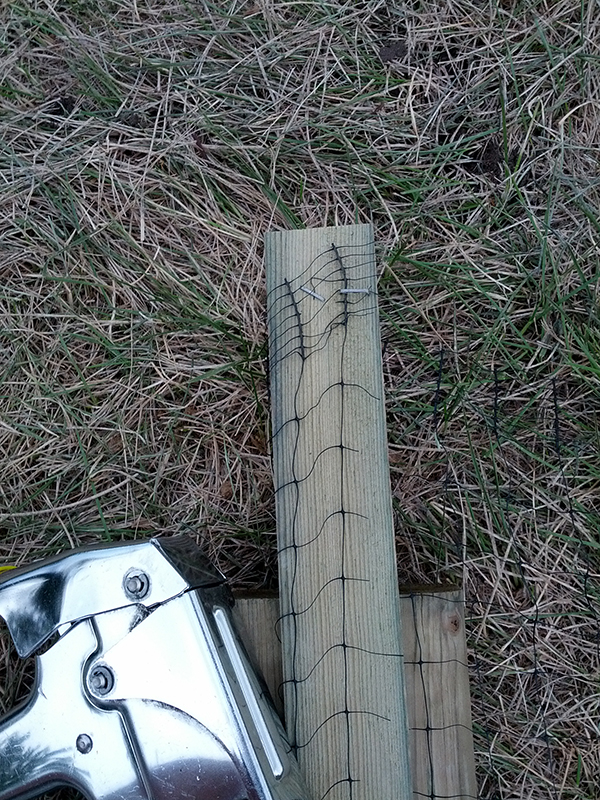
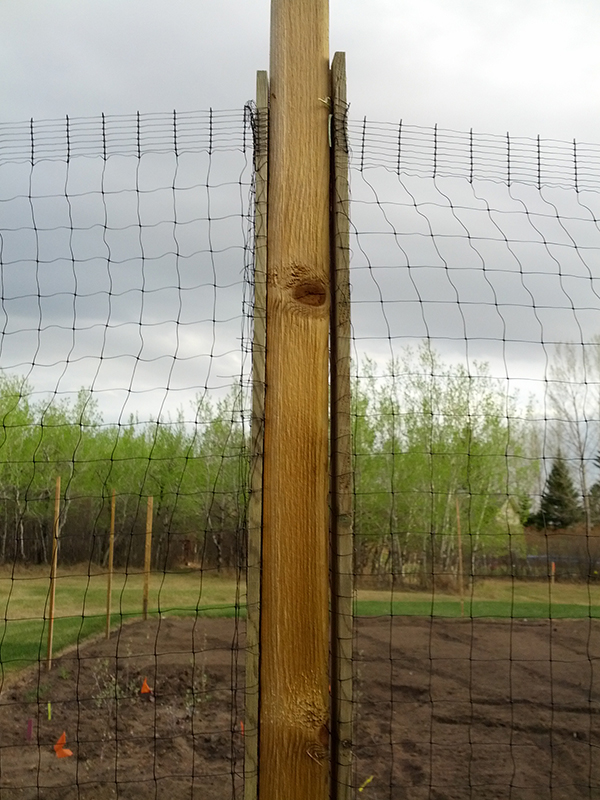
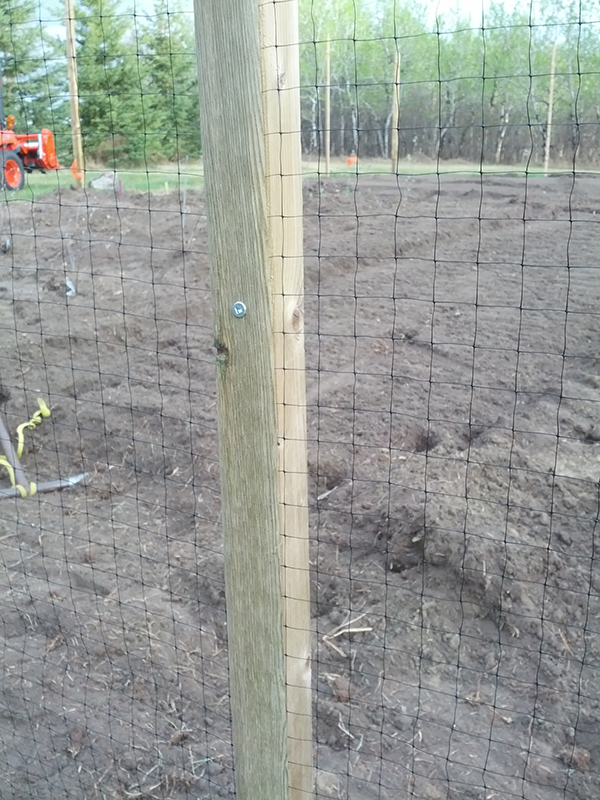
This year I decided to expand the garden area, which required some additional deer fence. One of the issues with the original fence it that it is difficult to tension it across the poles only using staples. It is also difficult to put enough nails into the mesh fence to proper secure it at tension points. Additionally, I like to get my tractor into the garden area to rototill in the spring, which is much easier if a portion of the fence can be removed. For the fence expansion I ripped a 2X4 into 1/4” thick strips and crosscut them to be 7’ high. I stapled the deer mesh in around 4 spots to the ¼” strips and then twisted the strips to wrap the mesh around them two times. To fasten the mesh to the posts I used screws to attach the ¼” strips. This results in a much better way to fasten the mesh than staples alone, and also allows a person to easily remove a section of the fence by simply unscrewing the ¼” strip. I’ve attached a couple pictures below of attaching the mesh to the strips and how the strips look attached to the poles. A note that it is important to keep the cuts on the deer mesh straight and square. This also always you to easily re-tension the mesh if it starts to sag by simply unscrewing the ¼” strip, making a half turn, and reattaching it to the post. I used 9 foot spacing between my posts, so I created a “tension strip” every second post (every 18 feet) that had the mesh wrapped around it and simply attached a ¼” strip to the front of the non-tension posts to hold the mesh.
Hi Roger
We bought this fencing too but disappointed because it tore quite easily., in fact, even as we were stapling it up! How long did the original mesh last for you?
PS I like your idea of using the 1/4 ” strips.
We originally had issues with it tearing, especially when using staples, but the strips helped with that significantly. We had no issues with tearing the first year, but by the end of the second year had one section that had torn. At the beginning of the third year we expanded our garden area and I ended up using a four foot large wire mesh and three thin wires on top spaced at 1 foot, for a total of a 7 foot fence. This just finished its second year of use with zero issues. I am still using the thinner mesh for smaller fences close to buildings where I want them to be almost invisible. Next spring I’ll try to post some pictures of the 2.0 version of the fence.